A (NOT SO BRIEF) HISTORY
It only took about 2 goddamn years to go from an idea on paper to a functional piece of software. The first ever concept of an ancient Sheet Manager was penned by Pritam in our private development forum:

Marcel embarked on a journey to implement the feature about a year ago now, during the recording of the ORIGINAL Adventures in Game Development Chapter 18. You can see a very early prototype in "AiGD: The Lost Chapter."
Jump to 11:09.
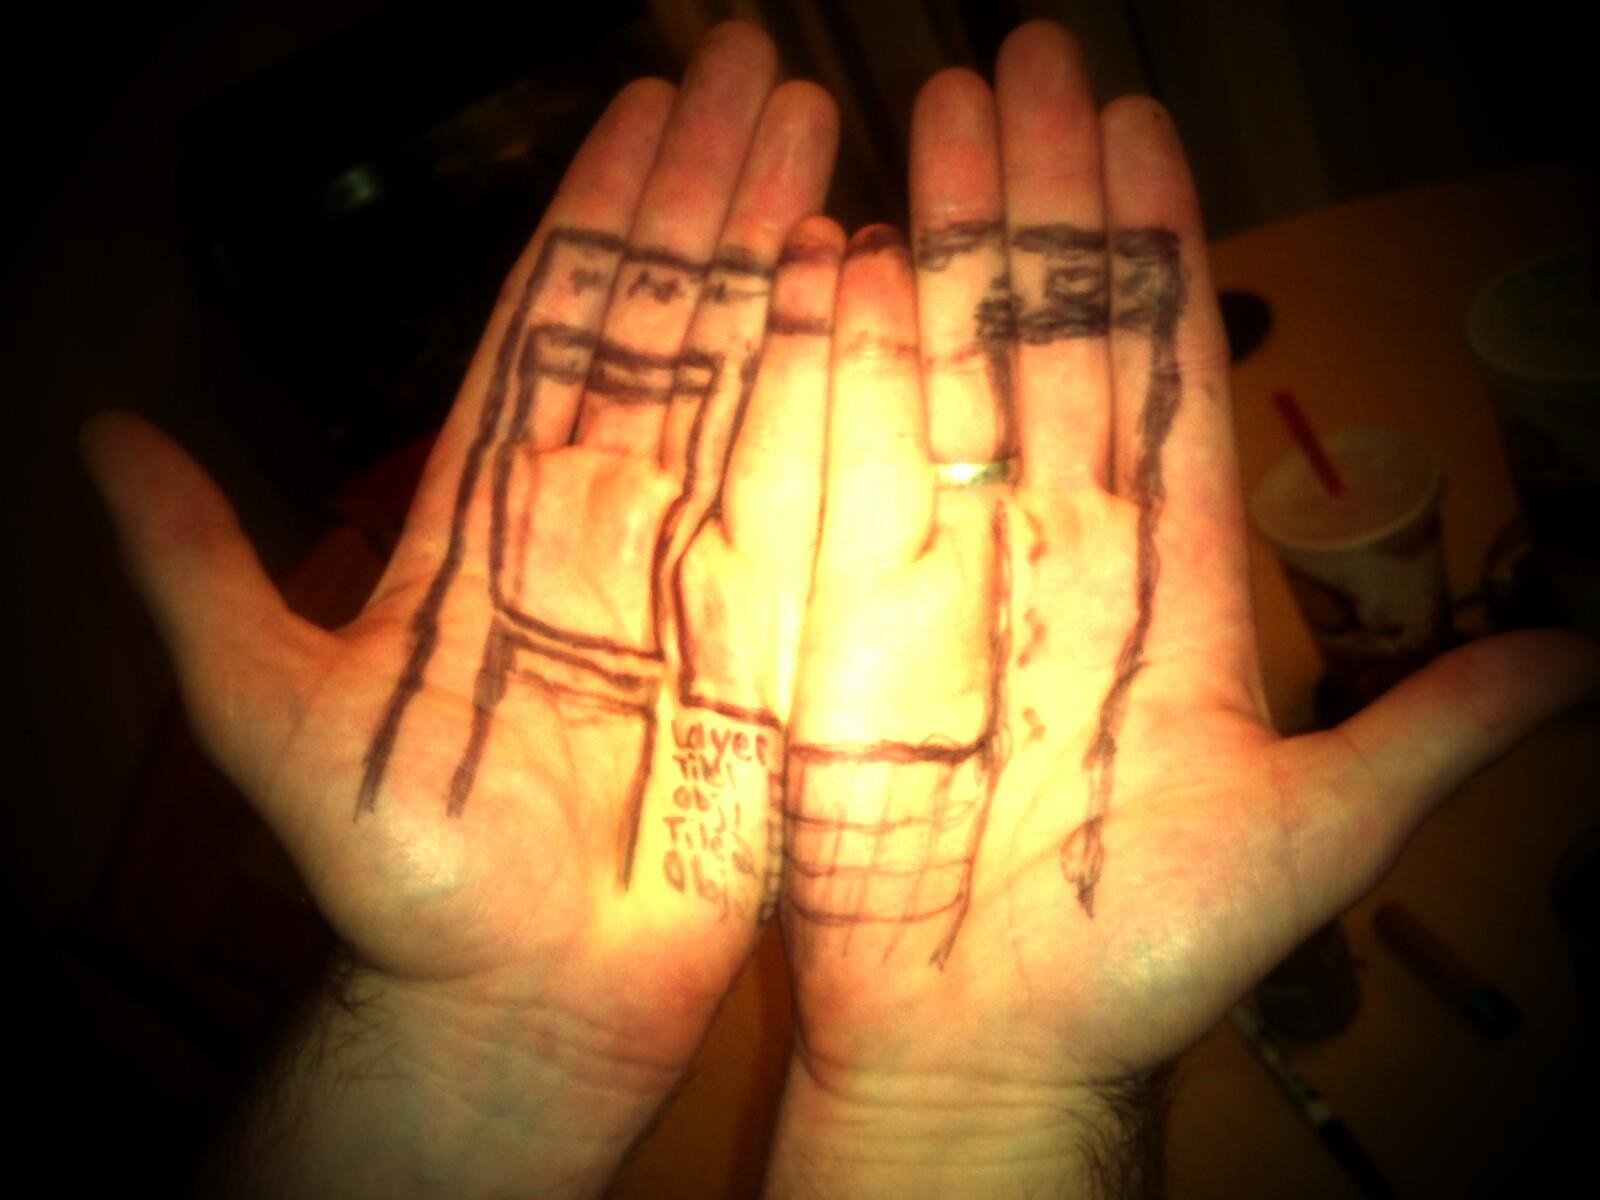
Concept of Marcel's original draft drawn on his hand, because he was high during the dev session.
A series of personal struggles prevented Marcel from completing his work, so SheetManager was then passed down to Jarrod Parkes who managed to create a pretty trendy front-end. Unfortunately the Parkes brothers are no longer with us, so once again SheetManager had fallen to the wayside...
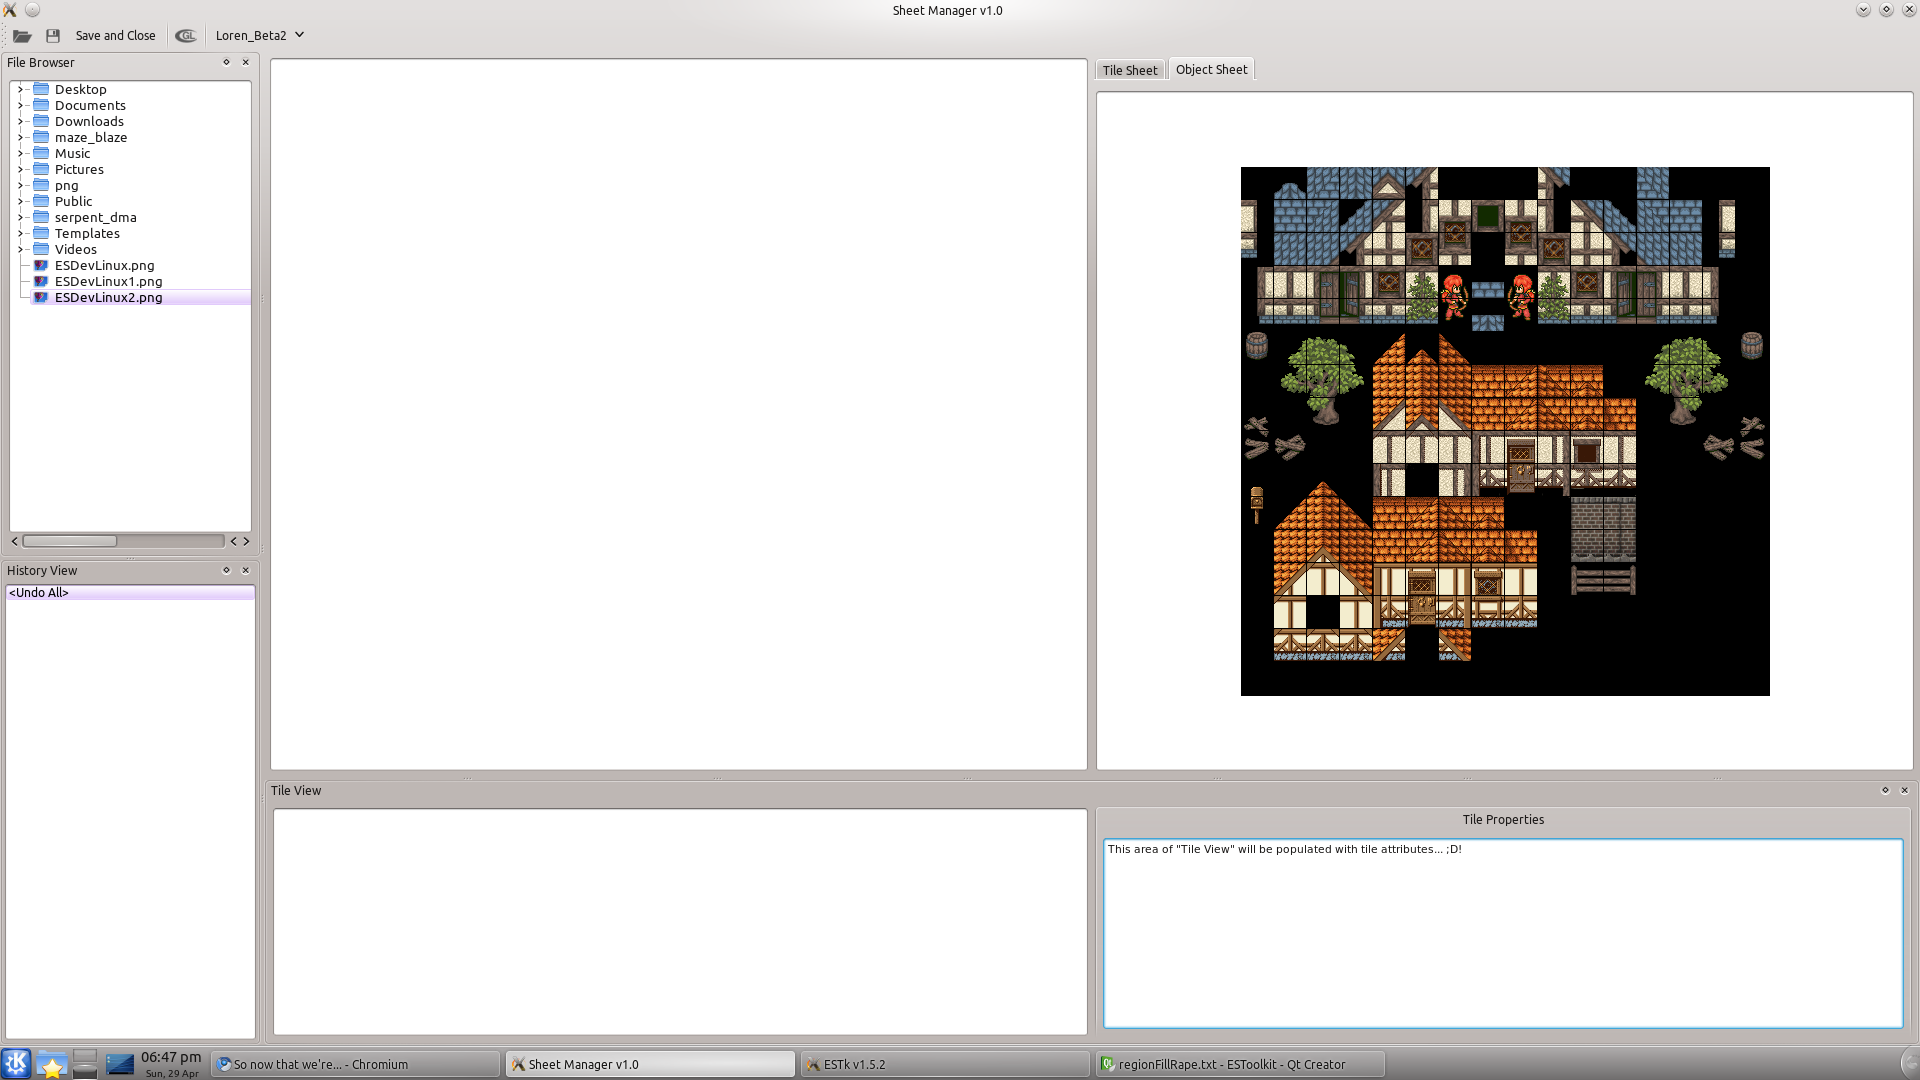
Unwilling to give up on the feature, because it's a genuinely useful tool (and because my ego wouldn't let me), I embarked on an epic adventure to see SheetManager through to completion. It wound up being quite a bit more than I had bargained for, as I wanted Sheet Manager to support all the tile-based functionality the main ESTk views support. This required massive refactoring of what was already the most complex code in the Toolkit. It took more time than I had anticipated, and I definitely got my ass kicked several times along the way, but I am very happy with the way things turned out. The refactoring even added a few new features to the main ESTk views!
HIGH LEVEL FUNCTIONALITY
1. Launching
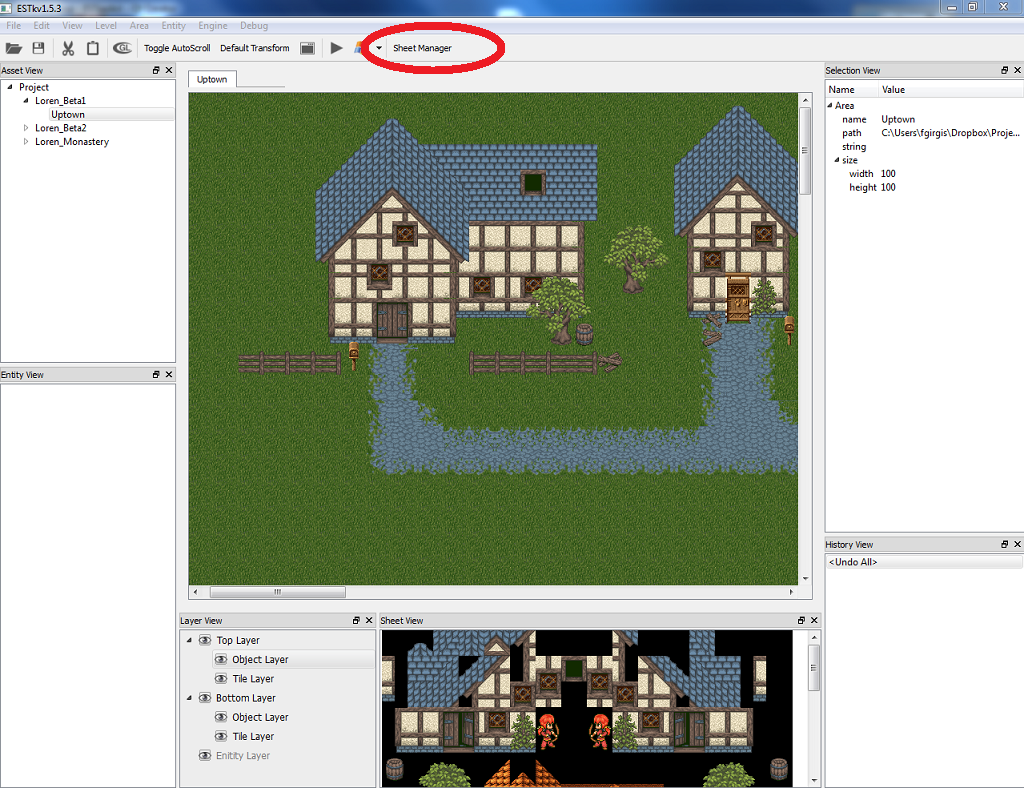
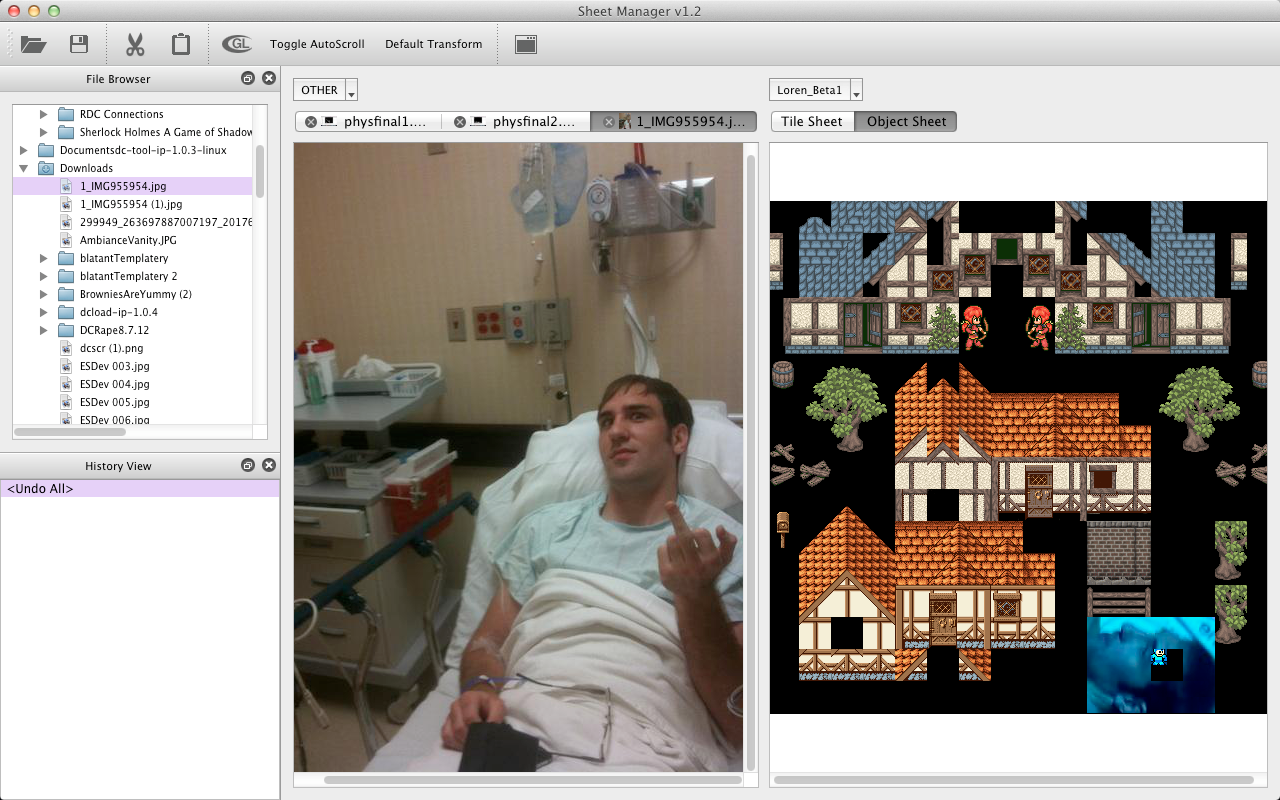
SheetManager is a separate utility that can be invoked by pressing the "Sheet Manager" button (we don't have a trendy icon for it yet) on the main ESTk Toolbar once a level has been loaded.
2. Choosing a Destination
The destination view is the view on the right side of the window. Once the window launches, the destination sheet defaults to the current active sheet in the ESTk main view. If you were editing the tile layer of Forest 1, Forest 1's tilesheet.png will be the destination. If you were editing the object layer of Forest 1, Forest 1's objectsheet.png will be the destination.
You can switch between the two sheets by using the tabs. You can also switch between different levels by using the level dropdown menu. 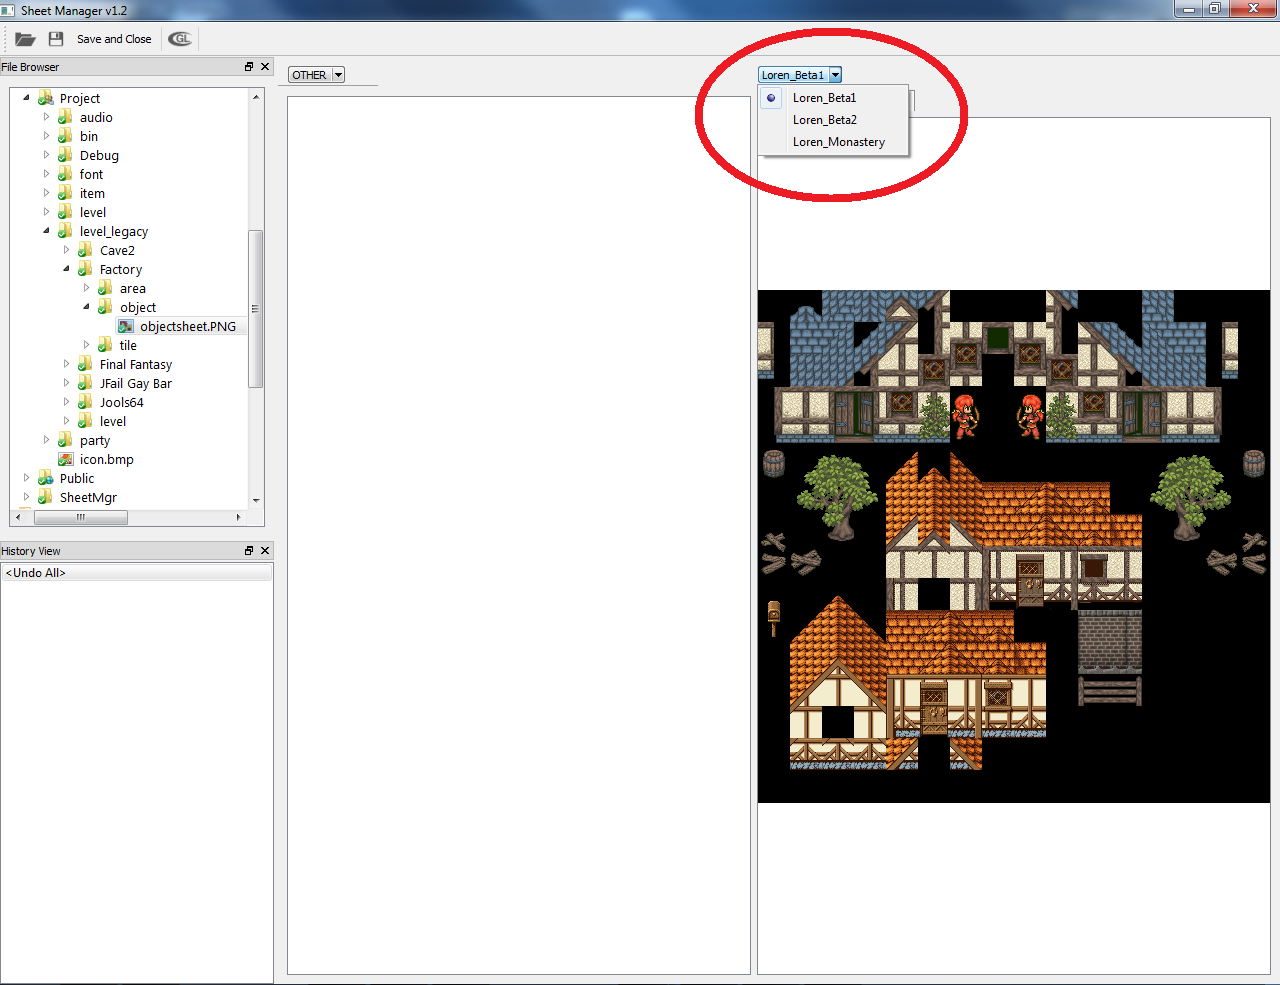
3. Choosing a Source
The source view is the view on the left side of the window. You can select any image as your source by using the File Browser widget on the far left. You can also use the folder icon on the toolbar. While the destination sheets are always stored as 512x512 PNGs (a requirement placed by the Elysian Shadows engine), the source images can be any dimension and support the following filetypes:
- PNG
- JPEG
- GIF
- BMP
Tiles are 32x32 pixels within ESTk. SheetManager will automatically pad images that are not multiples of 32 to allow for proper tiling. 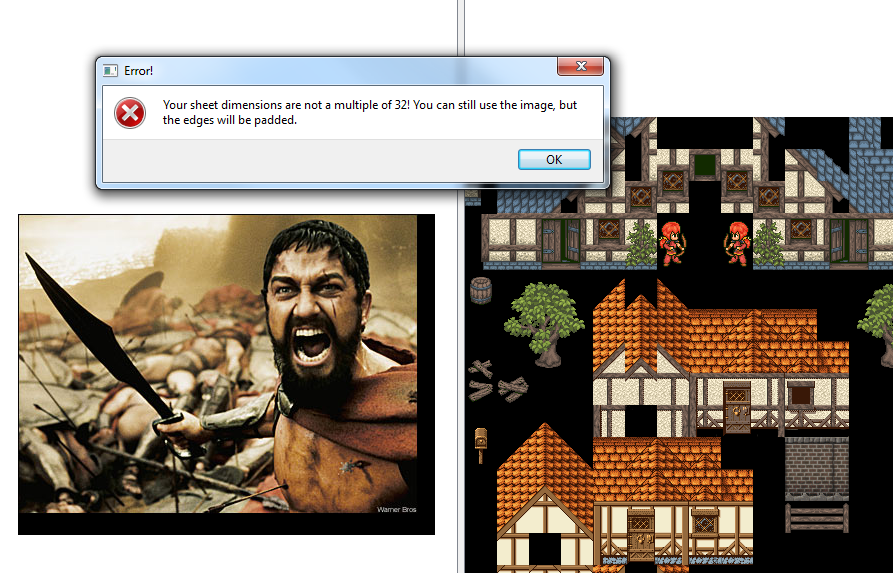
SheetManager also supports tabbed browsing for opening multiple sources. 
Note: The source-dropdown is currently hard-coded to "OTHER." In future versions of SheetManager, this will allow for the quick selection of a level sheet as a source. For now, this same functionality can be achieved by manually browsing the level's sheet as a source in the File Browser, so the feature isn't particularly high on the priority list.
Note2: You can also easily copy graphics from one level's sheet to another by using the cut+paste mechanism and pasting accross destination sheets.
4. Autoscroll, Pan, and Zoom
As with the main views of ESTk, SheetManager supports several methods of navigating both source and destination sheets.
- pan - You can pan accross a view by simply dragging its sheet with the left mouse button when no selection has been made.
- zoom - You can zoom in and out on a sheet by using the mouse wheel.
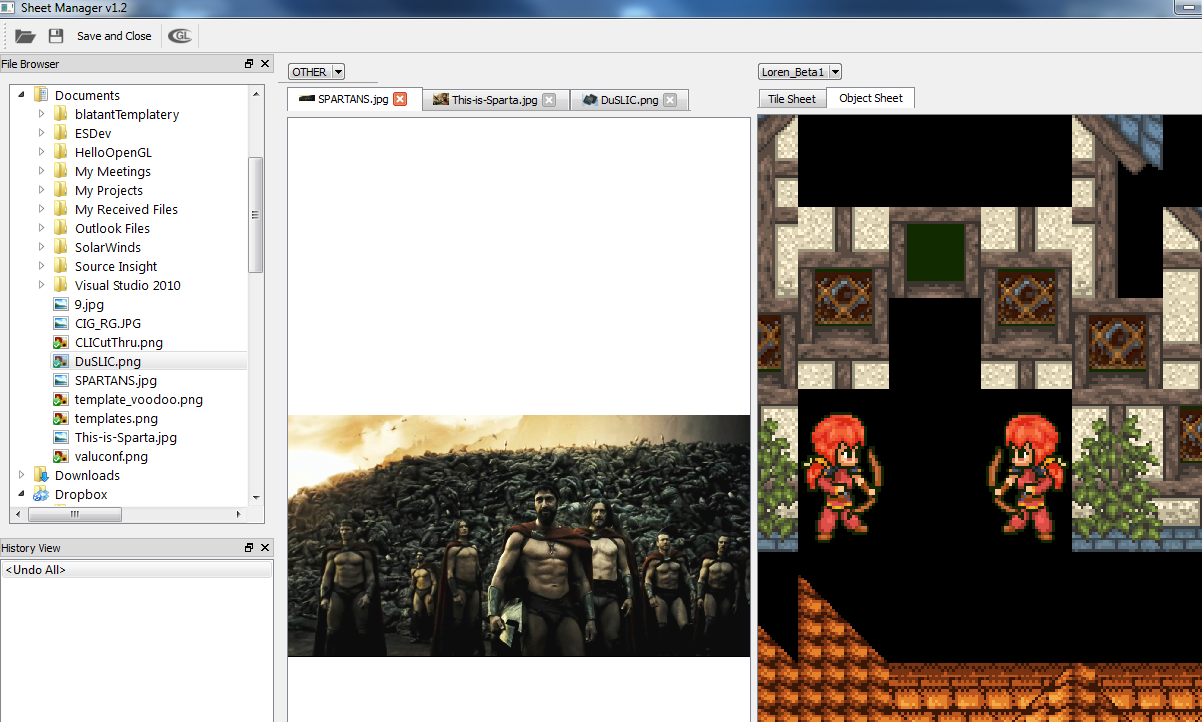
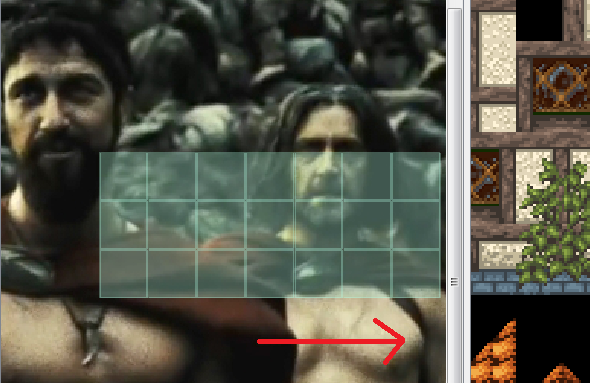
- autoscroll - once a selection has been made or is being made, the views will automatically pan the sheets for you as your mouse approaches their edge.
5. Selecting and Placing Tiles
Single tiles or a tiled region can be selected by using the right mouse button. Both the source and destination views can be used as a selection source.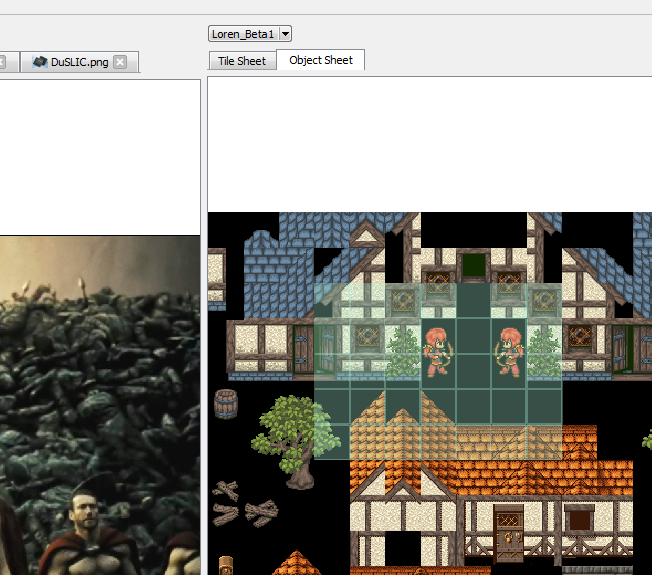
Once a selection has been made, it can only be placed in the destination view. Press the left mouse button to place the selection or hold the left mouse button and drag to place over a region. 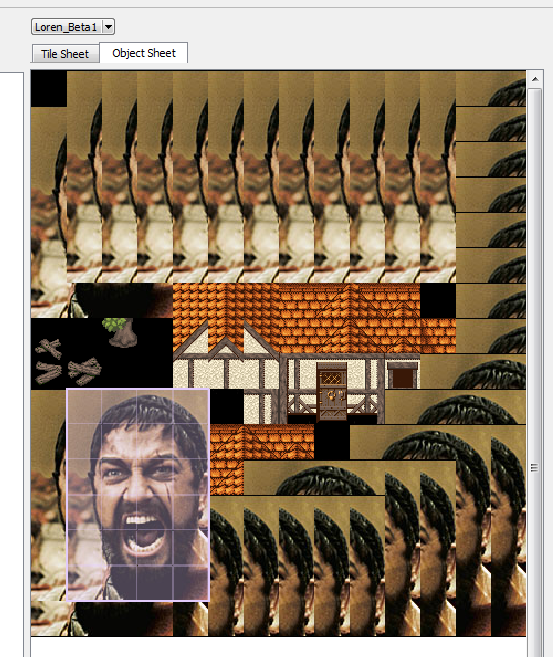
6. Undo/Redo
As the selection is placed, the history view will be populated with tile placement events. You can undo/redo these events by using the CTRL-Z/CTRL-Y keyboard shortcuts (CMD-Z/CMD-Y for OSX) or by clicking on a particular event in the history view.
7. Staggered Tile Selection
To make a staggered selection, simply hold CTRL (CMD on OSX) while making a selection, and you can select multiple regions. Not really particularly useful in the context of SheetView, but I still wanted to be able to support it. ;)
8. Region Filling Tiles
To fill a region with the current selection, simply hold CTRL (CMD on OSX) while making a tile placement. Once again, not particularly useful for SheetView, BUT WE WANT ALL OF THE TRENDY FEATURES GODDAMNIT! 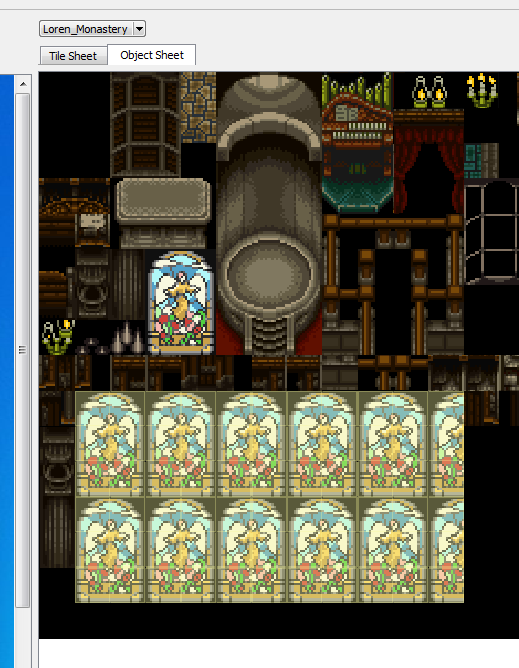
9. Staggered Selection Region Fill
For the king of the useless features that I only implemented to appease my own narcissism, region fill also works with staggered selections. This feature will no doubt help you on your journey!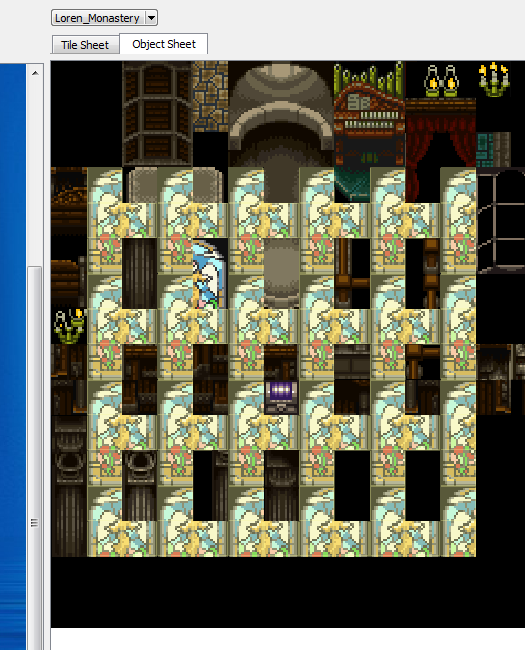
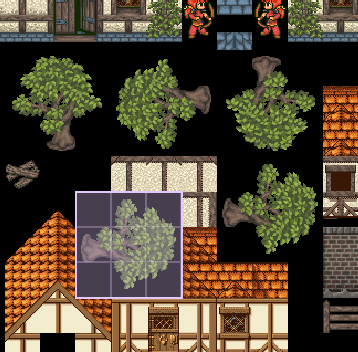
10. Selection Flip/Rotate
Now back to useful features... Once a selection has been made, it can be flipped and rotated by using the arrow keys:
- Up Key: Horizontal Flip
- Down Key: Vertical Flip
- Left Key: 90 Degree Counterclockwise Rotation
- Right Key: 90 Degree Clockwise Rotation
11. Cut+Paste
A selection can be cut to and pasted from the clipboard by using the CTRL-X and CTRL-V keyboard shortcuts (CMD-X and CMD-V on OSX). The clipboard persists during sheet changes in the destination view.
12. Saving
To save the current destination sheet, use the floppy disk icon or the "Save and Close" button on the Toolbar.
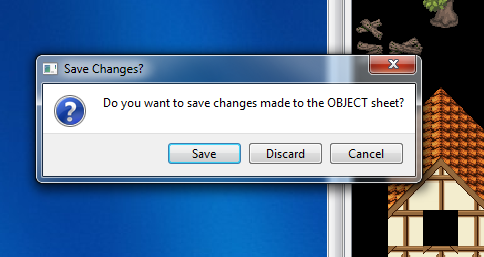
If you try to swap levels without saving, you will be prompted to save modifications to the tilesheet and/or objectsheet.
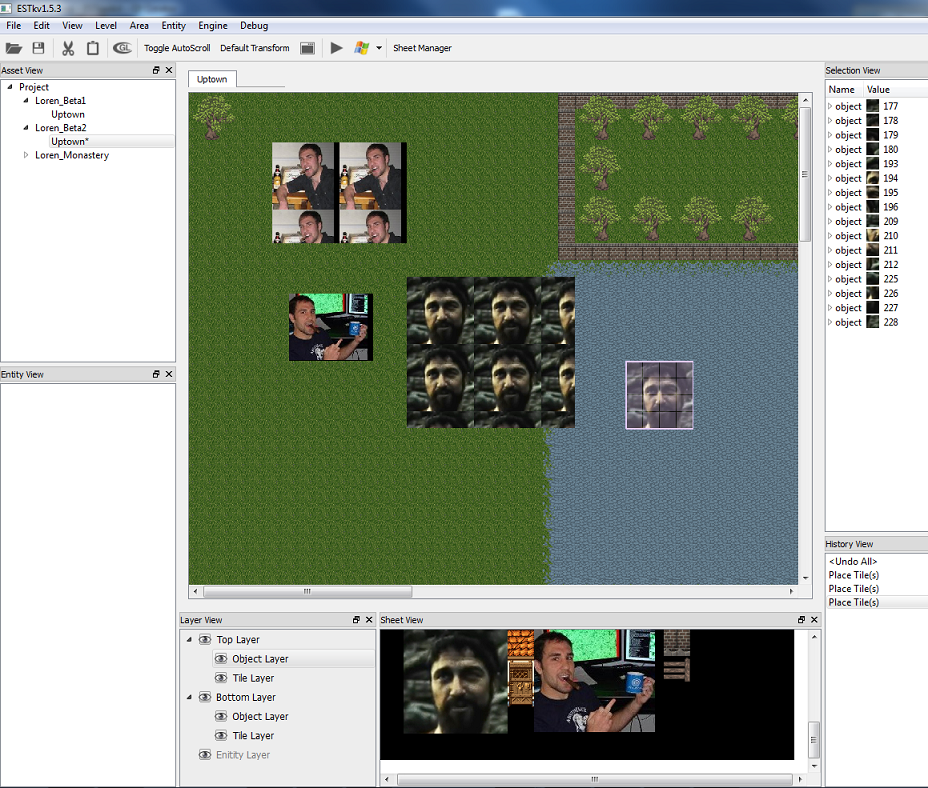
Note that the main ESTk Window will dynamically update with changes made to the tile and object sheets as soon as you exit SheetManager. You should see modifications made to the sheets reflected in both views immediately.
13. Persistance of SheetManager State
For the sake of convenience, exiting SheetManager then relaunching it will recover all open source image tabs and the current state of both the destination tile and objectsheet.
14. OpenGL Hardware Acceleration of Views
As with the views of the main ESTk window, both views support OpenGL-based hardware acceleration by pressing the OpenGL button on the toolbar. A modern PC should have no problem using the default software-based renderer, but opening an extremely large source image on a shitty machine may cause some performance drops. Depending on your machine and your OpenGL drivers, enabling hardware acceleration may improve performance.
Note that the default state of the OpenGL toggle button is inherited from the ESTk main view.
15. Multiplatform-as-fuck-edness
As with everything else in ESTk, SheetManager is a fully cross-platform utility.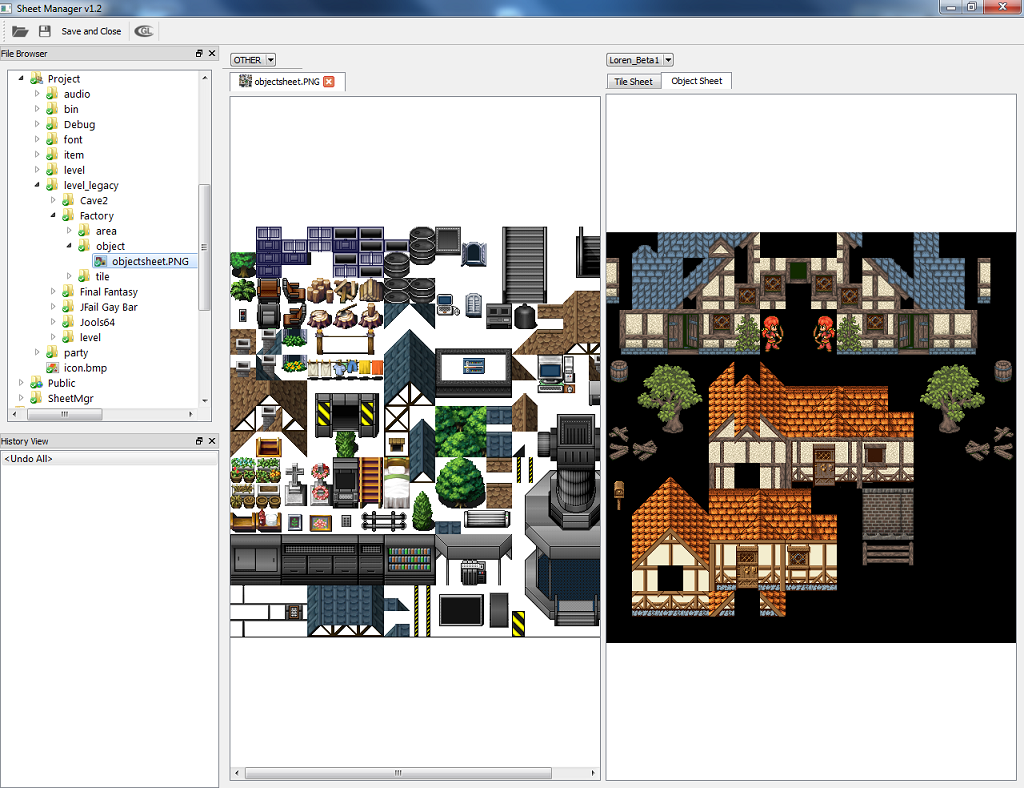

* Additions to Main ESTk
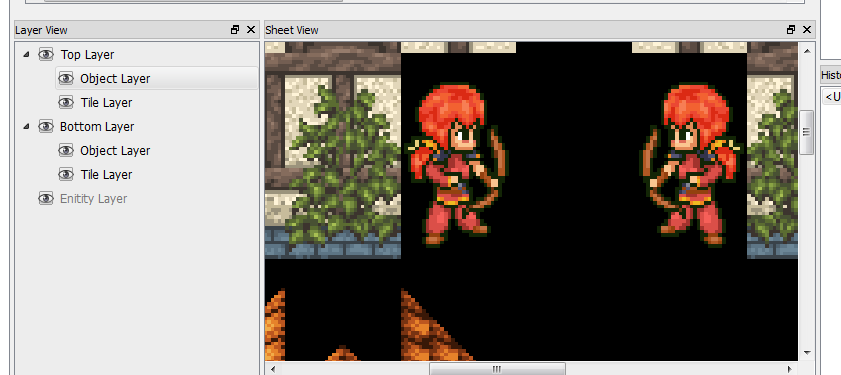
After the insane amount of refactoring required of the GraphicsView heirarchy shared between ESTk and SheetManager, a few improvements were made to ESTk as an indirect result.
As with all tile-based views, SheetView now supports
- pan
- autoscroll
- zoom
CODE AND BACK-END (TILE SELECTION/PLACEMENT ENGINE)
The vast majority of the actual "logic" to implement SheetManager already existed within ESTk. An astute reader would probably notice that the list of SheetManager features is essentially the same as the features offered by the main ESTk views. Functionally, SheetManager's SourceView is equivalent to ESTk's SheetView, and SheetManager's DestView is equivalent to ESTk's MapView.
Unfortunately it was nowhere near as simple as leveraging existing ESTk functionality to implement SheetManager. ESTk's selection and placement logic is essentially the heart of the Toolkit. It is an extremely complex beast that has grown exponentially more complex as we have added new features and optimizations to ESTk. It was not written as an abstract "Tile Selection" mechanism that could be easily reimplemented. I don't believe this was a fault of the original design, as it was already so damn complex and standalone that it really didn't warrant an extra layer of abstraction adding to the complexity. SheetManager changed that, as it was a separate system that could greatly benefit from leveraging this existing functionality.
Most my time creating SheetManager was spent refactoring existing ESTk code to create an abstract, standalone Tile Selection/Placement Engine that could be used in both ESTk and SheetManager. As such, I would rather spend time presenting the Tile Selection/Placement Engine used by the entire Toolkit rather than simply discussing the SheetManager-specific application of this engine.
There are essentially 4 separate class heirarchies required to implement the Tile Selection/Placement Engine.
NOTE: In the interest of simplicity, class definitions only include the public API and virtual functions to be reimplemented. Protected and private internal functions aren't presented.
1. Views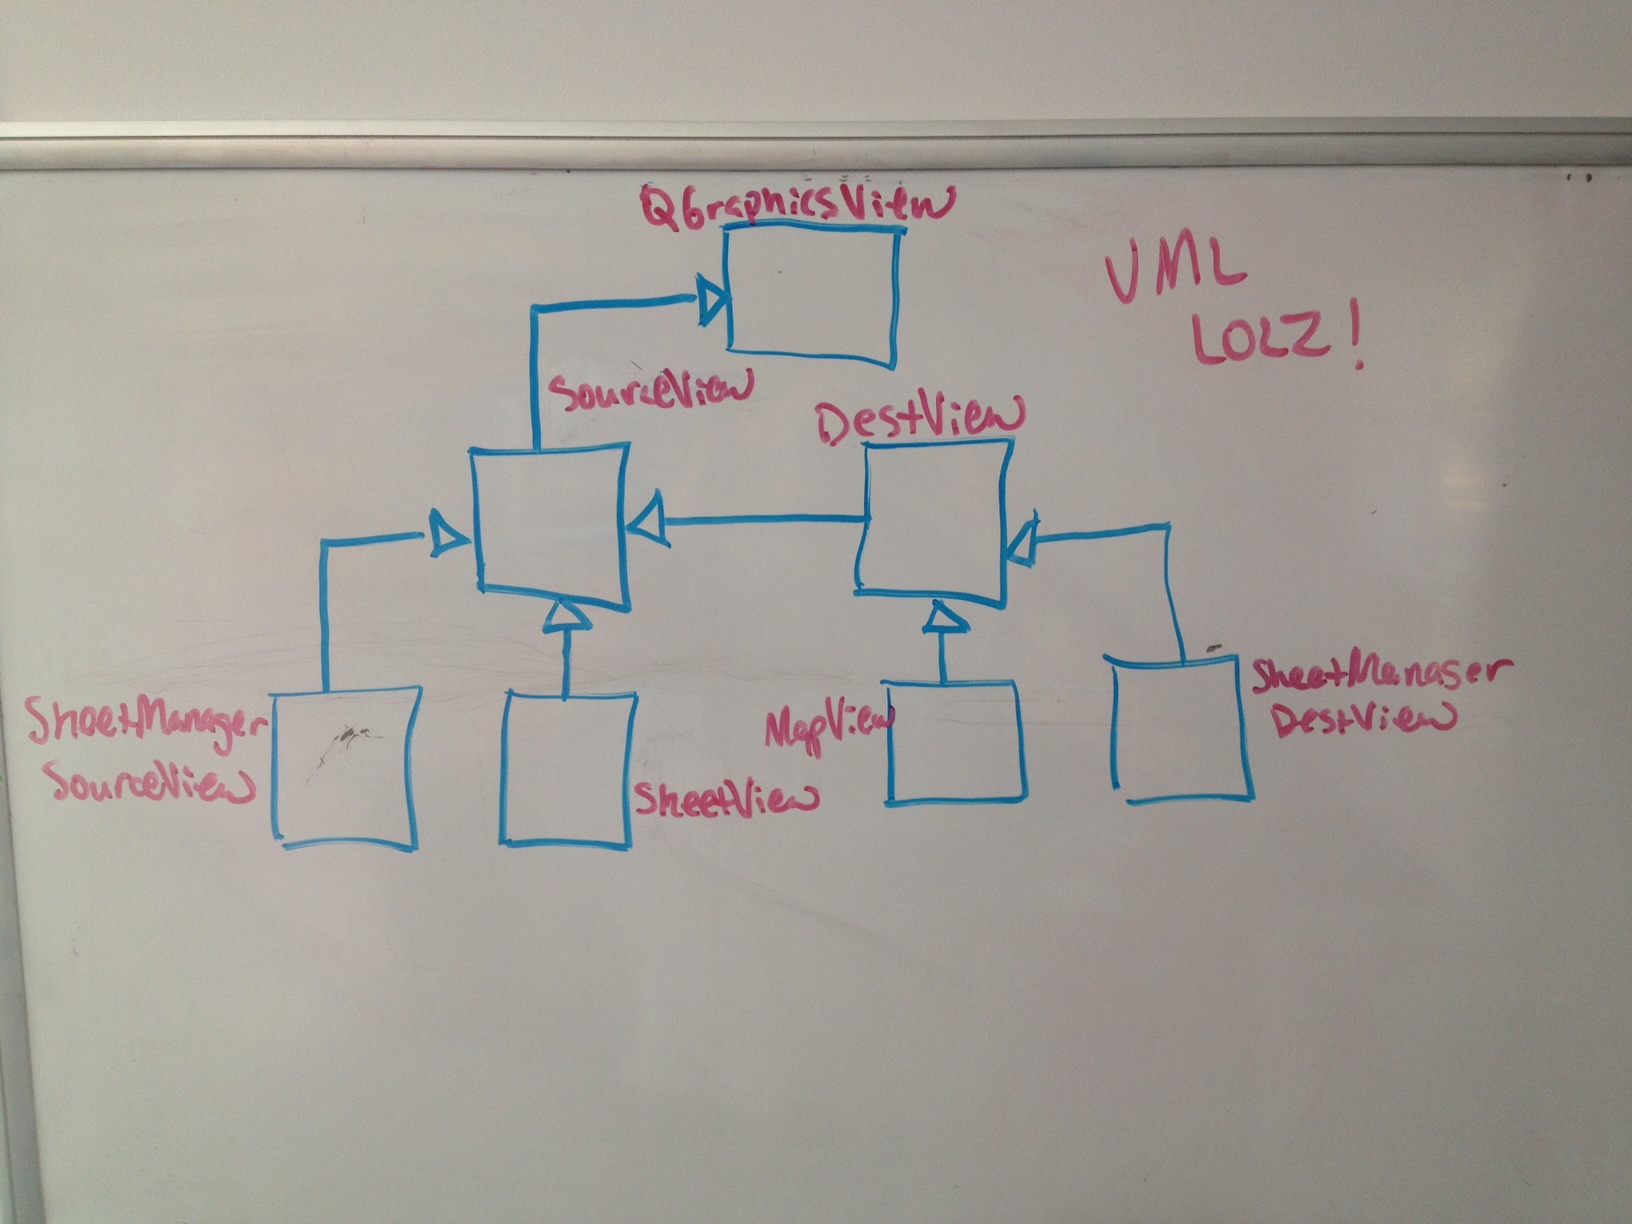
The Views are essentially the heart of the Tile Selection/Placement mechanism. They are QGraphicsViews implementing additional logic required to select and place tiles.
SourceView
SourceView implements all logic required for a QGraphicsView to be used as a tile selection source. Directly implementing this functionality is SheetView within ESTk and SheetManager's SourceView.
[code]
class SourceView : public QGraphicsView {
[..]
public:
/* EXTERNAL SELECTION
These two functions are for abstracting the external selection mechanism away
from the internal selection mechanism. The default implementation converts in-scene
selections to Toolkit terrain selections. To use some other selection container (SheetManager),
override these.
*/
//logic for converting an internal "scene selection" to an external selection container
virtual void _externalSelectionCreate(void) = 0;
//logic for clearing external selection container
virtual void _externalSelectionClear(void) = 0;
};
[/code]
- void _externalSelectionCreate(void) - Creates an external TileSelection object from the internal scene selection after an in-scene selection has been made, and sets the current selection to that object.
- void _externalSelectionClear(void) - Clears the external selection object when no tiles have been selected.
Note: These accessors are provided so that the Tile Selection/Placement Engine can use an existing external selection mechanism. In ESTk, a "Selectable" can be an Area, Level, Entity, or Tiles. There is a global "Current Selection" state which can select any one of these types at a time.
DestView
DestView inherits from SourceView (as any DestView can also be a source) and adds functionality required for a QGraphicsView to be used as a tile selection destination. Directly implementing this functionality is MapView within ESTk and SheetManager's DestView.
[code]
class DestView : public SourceView {
[..]
protected:
//Overridable DestView functionality
virtual TerrainSelection *_getTileSelection(void) const = 0;
virtual void _setTileSelection(TileSelection *const sel) = 0;
virtual QUndoStack *_getUndoStack(void) const = 0;
virtual TileGroupUndoItem *_createPlaceTileGroupUndoItem(void) = 0;
};
[/code]
- TileSelection *_getTileSelection(void) const - Returns the external TileSelection object or NULL if there is no TileSelection (or if the current selection is not a tile object used by the Tile Selection/Placement Engine).
- void _setTileSelection(TileSelection *const sel) - Allows DestView to set the external selection object to a stored TileSelection object (used internally for copy+paste mechanism).
- QUndoStack *_getUndoStack(void) const - Returns the current QUndoStack to be used for placing tiles. In ESTk, every Area has its own QUndoStack. In SheetManager, there is one QUndoStack for the tilesheet and one for the objectsheet.
- TileGroupUndoItem *_createPlaceTileGroupUndoItem(void) - Used to construct a PlaceTileGroup to be added to the current QUndoStack each time a tile is placed.
2. TileGraphicsItem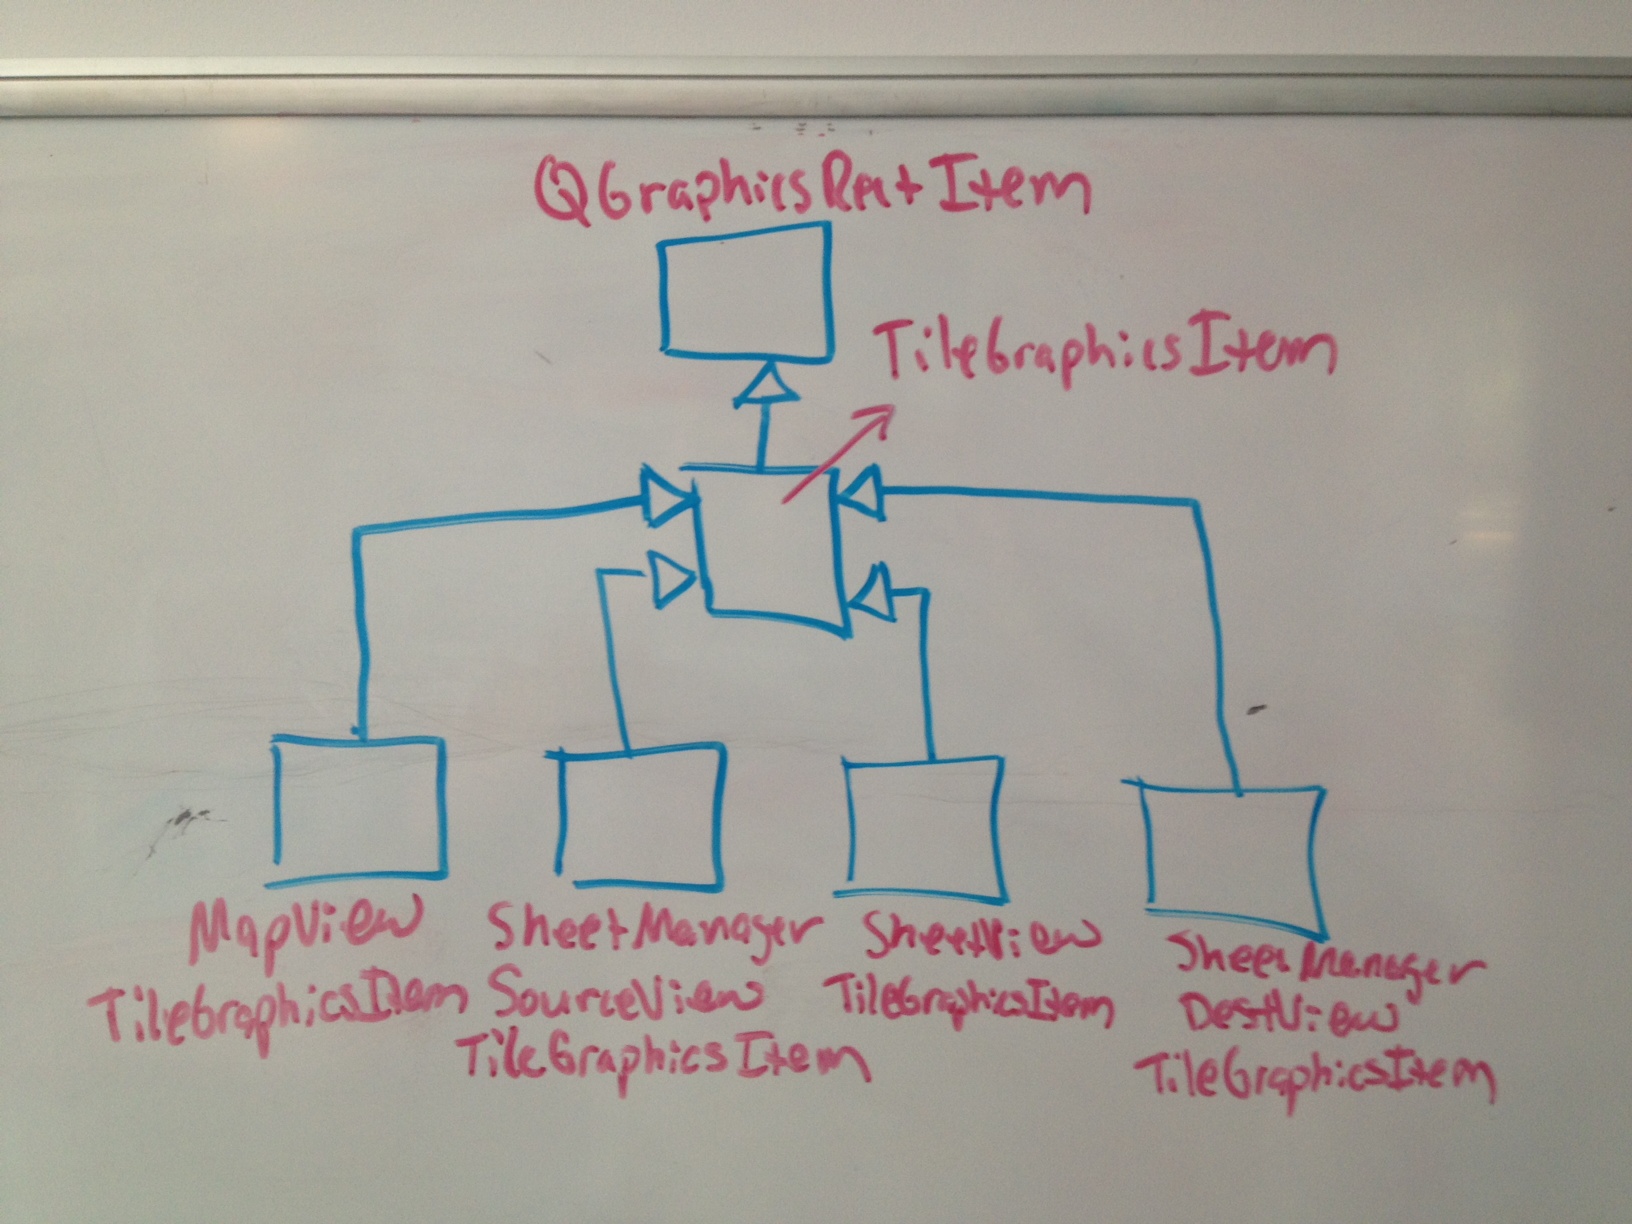
TileGraphicsItems represent each tile LOCATION within a View. They are QGraphicsRectItems implementing logic required to render a tiled region within either a SourceView or DestView. Tiles can be rendered with a flip or rotation applied. They can also be rendered with special decorations for when they are being selected or filled in a few. They represent tiled "regions" rather than actual tiles, because they must be able to render tiles within a selection (rather than the tile under the selection) when a selection hovers over them.
[code]
class TileGraphicsItem: public QGraphicsRectItem {
[..]
private:
virtual bool _isSelectedWithinView(const unsigned x=0, const unsigned y=0) const=0;
virtual const QPixmap _getTilePixmap(const uint16_t index, const bool selection = 0) const=0;
virtual const TerrainSelection *_getTileSelection(void) const=0;
}
[/code]
- _isSelectedWithinView(const unsigned x=0, const unsigned y=0) const - Used to allow a TileGraphicsItem to determine whether it is currently selected within a SourceView. If a tile location isn't specified (default values are used), it is assumed the TileGraphicsItem is referring to itself
- const QPixmap _getTilePixmap(const uint16_t index, const bool selection = 0) const - Returns the sprite image from "index" location in the current destination sprite sheet. If "selection" is true, returns the sprite image at "index" from the source sprite sheet.
- TerrainSelection *_getTileSelection(void) - Returns the current TileSelection (if there is one).
3. TileSelection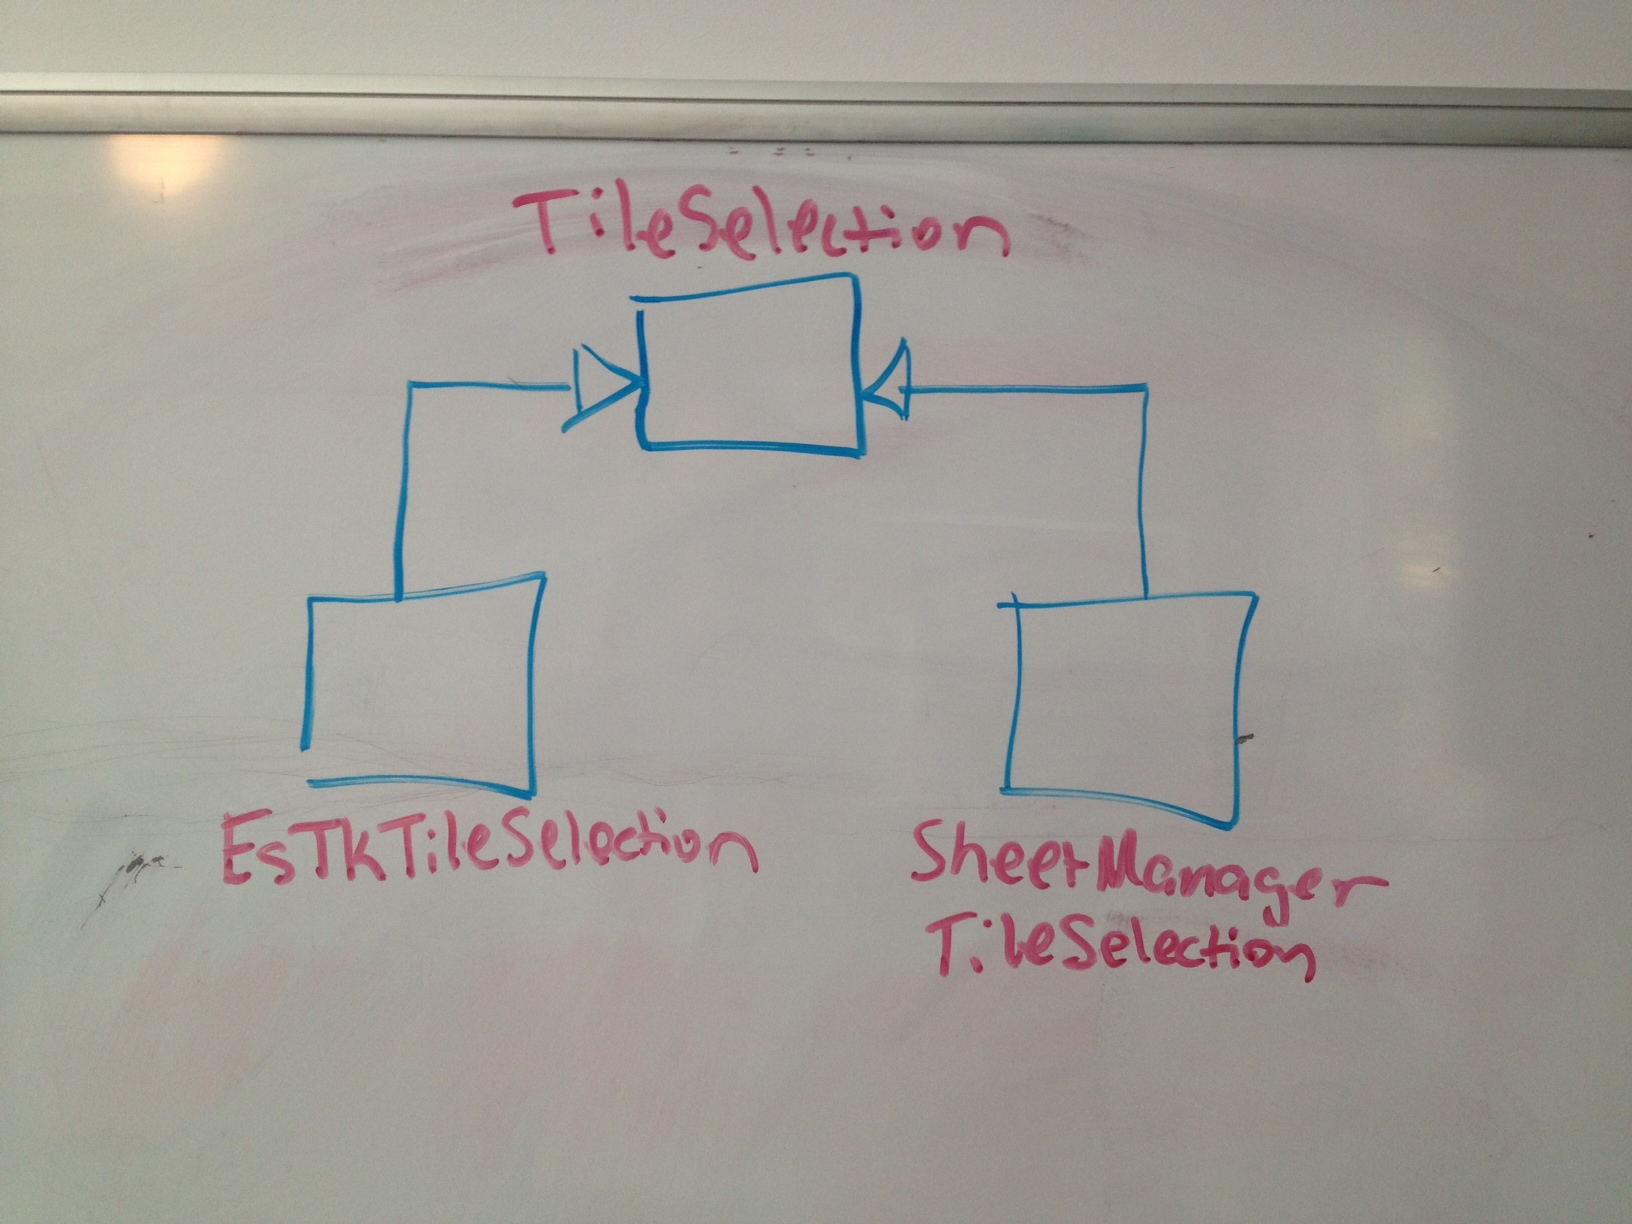
TileSelection represents an internal structure used to hold the data of a selected region. It is essentially an encapsulation of a 2D array of data. After you make a selection within a SourceView or DestView, this in-scene selection is converted from a group of flagged TileGraphicsItems to a TileSelection. TileSelection is then accessed from TileGraphicsItems to know how to render a selection passing over them, and from the DestView when populating TilePlacementUndoItems.
There are no virtual methods for TileSelection. Any additional data required for a specific application of the engine is passed to the object via the constructor of the derived class.
4. TileGroupUndoItem
TileGroupUndoItems are QUndoCommands that represent the action of actually making a tile placement and modifying the data that a DestView represents. They are essentially a group of tile locations containing their new tile data and previous tile data. This data is used to implement undo() and redo() commands that set the value at each tile location to either the new or previous value. They also must support mergeWith() functionality to allow them to combine with other TileGroupUndoItems. This is so that if you hold the left mouse button down and drag to make a slew of tile placements, these tile modifications are grouped together into one set of TileGroupUndoItems instead of hundreds.
[code]
class TileGroupUndoItem: public UndoItem {
public:
struct BaseTileData {
unsigned index;
GY_RECT_TEX_ORIENT orient;
};
protected:
bool _combine;
TileGroupUndoItem(const UndoItem::TYPE type): UndoItem(type), _combine(true) {}
public:
inline void setCombine(const bool combine) { _combine = combine; }
virtual bool addTile(const QPoint loc, const BaseTileData &newBaseData) = 0;
};
template <typename T>
class PlaceTileGroupUndoItem: public TileGroupUndoItem {
protected:
//template <typename C>
struct TileEntry {
T oldData, newData;
};// _data;
QMap<QPoint, TileEntry> _entryGroup;
//SUBCLASS ME, CUNTWASPS! --FG
inline PlaceTileGroupUndoItem(const UndoItem::TYPE type): TileGroupUndoItem(type) {}
virtual bool _withinBoundaries(const QPoint loc) const = 0;
virtual T _getOldTileData(const QPoint loc) const = 0;
virtual T _getNewTileData(const QPoint loc, const BaseTileData &newBaseData) const = 0;
public:
virtual bool addTile(const QPoint loc, const BaseTileData &newBaseData) {
if(!_withinBoundaries(loc)) return false;
//Derived populates newData based on passed-in baseData
T newData = _getNewTileData(loc, newBaseData);
const typename QMap<QPoint, TileEntry>::iterator i = _entryGroup.find(loc);
//Entry already exists. Keep old data and override new data
if(i != _entryGroup.end()) {
i.value().newData = newData;
}
else { //Create new entry
TileEntry newEntry;
newEntry.newData = newData;
newEntry.oldData = _getOldTileData(loc);
_entryGroup[loc] = newEntry;
}
return true;
}
virtual bool mergeWith(const QUndoCommand *other) {
//Make goddamn sure these two commands are mergeable
if (other->id() != id() || !_combine) return false;
const QMap<QPoint, TileEntry> &newEntryGroup = static_cast<const PlaceTileGroupUndoItem *>(other)->_entryGroup;
for(typename QMap<QPoint, TileEntry>::const_iterator j = newEntryGroup.begin(); j != newEntryGroup.end(); ++j) {
const typename QMap<QPoint, TileEntry>::iterator i = _entryGroup.find(j.key());
//New tile entry already exists in old group
if(i != _entryGroup.end()) { //Update newData, keeping same oldData of entry
i.value().newData = j.value().newData;
} else { //Insert new tile entry into old group
_entryGroup[j.key()] = j.value();
}
}
return true;
}
};[/code]
You will probably notice that this is a fairly complex class template. SheetManager required additional tile data to be housed within the TilePlacementUndoItem's internal structure that was not required for just the ESTk scenes. In ESTk, the SheetView (Source) and the MapView (Destination) are both rendering from the same tile sheet, so the only values required to be stored for each tile location are a tile index and a tile orientation. For SheetManager, since the SourceView and DestView are rendering tiles from two completely different images, each tile location requires an actual QPixmap image along with a tile index and orientation. In order for TilePlacementUndoItem to support custom datatypes like this, it needed to be a class template. Besides, I am always a fool for a good C++ template problem. ;)
Note: The separation between a TileGroupUndoItem and a PlaceTileGroupUndoItem was required so that the DestView could refer to one of these objects polymorphically without needing its template parameter.
- bool _withinBoundaries(const QPoint loc) const - Returns true if the given tile location is within the selectable region and false if not.
- T _getOldTileData(const QPoint loc) const - Returns the data originally located at a tile region when the tile placement was made.
- T _getNewTileData(const QPoint loc, const BaseTileData &newBaseData) const - Returns the new data being placed at the specified tile location
5. MapView-Specific Optimizations
I wanted to take a minute to note special considerations given to MapView and the implications this has had on the Tile Selection/Placement Engine's heirarchy. MapView is the main view of ESTk. Unlike the other views which usually render about 256 GraphicsItems (the amount of tiles in a tilesheet), MapView must be capable of rendering the largest map size with FOUR layers of tiles. That's a size of 200x200 tiles times 4 layers = 160,000 tiles!
The biggest hurdle during the development of ESTk has been getting MapView to handle this many tiles with acceptable performance. There was a time when the Toolkit was literally unusable on certain platforms because of the amount of time it took a QGraphicsScene to be populated with that many tiles. We have discovered that QT's internal BSP mechanism can realistically support a total of around 40k QGraphicsItems within a scene before performance goes to shit (which makes sense, because the QT SDK includes a demo called "40000 Chips" demonstrating this).
Because of this, MapView has undergone several iterations as we tried to implement clever ways to circumvent this constraint and optimize the scene's performance. Our first approach was to make each TileGraphicsItem represent 4 tiles: the tile at that location for each layer within the map. This resulted in a drastic performance improvement, as we dropped back down to the theoretical 40k maximum for our scenes. Unfortunately this introduced another problem: Z ordering. Since each tile renders itself as 4 different layers, we lost the ability to render entities or other in-game objects between layers. This wound up being unacceptable, and we ultimately had to rewrite the MapView once again.
Our current approach uses only 4 TileGraphicsItems which allows us to handle z ordering properly. Each item renders an ENTIRE LAYER. Obviously this required an intelligent rendering algorithm to know which portion of the map is currently being displayed in the viewport (and not overdraw like a motherfucker). We have overloaded TileGraphicsItem's render() function within MapViewTileGraphicsItem to intelligently render an entire layer:
[code]
/*
This shit is the heart of all terrain rendering for the map.
Exercise caution before fucking with this. --FG
*/
void MapViewTileGraphicsItem::paint(QPainter *painter, const QStyleOptionGraphicsItem */*option*/, QWidget */*widget*/) {
if(!getCurrentLevel() || !getCurrentArea()) return;
//I'm culling this shit manually, so enabling this should actually be slower... --FG
//painter->setClipRect(option->exposedRect);
//Calculate the visible sceneRect region
QPointF topLeft = _view.dst->mapToScene(0,0);
QPointF bottomRight = _view.dst->mapToScene(_view.dst->viewport()->width(), _view.dst->viewport()->height());
QRectF visibleSceneRect(topLeft, bottomRight);
//Calculate the terrain render region based on the sceneRect
QRect renderRegion;
renderRegion.setTop((((int)visibleSceneRect.top())+16)/32-1);
renderRegion.setLeft((((int)visibleSceneRect.left())+16)/32-1);
renderRegion.setRight((((int)visibleSceneRect.right())+16)/32+1);
renderRegion.setBottom((((int)visibleSceneRect.bottom())+16)/32+1);
//Bind the region
if(renderRegion.left() < 0) renderRegion.setLeft(0);
if(renderRegion.right() > getCurrentArea()->getMapWidth()) renderRegion.setRight(getCurrentArea()->getMapWidth());
if(renderRegion.top() < 0) renderRegion.setTop(0);
if(renderRegion.bottom() > getCurrentArea()->getMapHeight()) renderRegion.setBottom(getCurrentArea()->getMapHeight());
//Move the painter to the beginning of the renderRegion
painter->translate(32*renderRegion.left(), 32*renderRegion.top());
//Check if the layer this Item represents is even enabled
if(getAssets()->getLayerVisible(_layer)) {
//Iterate over entire visible region
for(int j = renderRegion.top(); j <= renderRegion.bottom(); ++j) {
for(int i = renderRegion.left(); i <= renderRegion.right(); ++i) {
/*Optimization -- If we aren't the current layer, then there is
no reason we will even have a special render decoration.
Skip all of the bullshit logic.*/
if(getAssets()->getCurrentLayer() != _layer) {
_renderTile(painter, i, j, DRAW_NORMAL);
}
else {
/*We can potentially be rendered specially.
Check the status of the tile to determine
how to render the fucker.*/
if(_isTileSelection(i, j)) {
_renderTile(painter, i, j, DRAW_SELECTION);
}
else if(_isTileSelecting(i, j)) {
_renderTile(painter, i, j, DRAW_SELECTING);
}
else if(_isTileFilling(i, j)) {
_renderTile(painter, i, j, DRAW_FILLING);
}
//nothing special about the tile (render normally)
else {
_renderTile(painter, i, j, DRAW_NORMAL);
}
}
//advance to next column
painter->translate(32, 0);
}
//advance to first column of next row
painter->translate(-32*(renderRegion.width()), 32);
}
}
}
[/code]This once again resulted in a gigantic performance boost, but we once again had to pay a high price for this... Since every tile is no longer a separate QGraphicsItem, we could no longer utilize QT's built in selection mechanism for selecting a tile within the MapView. Because of this, I was forced to implement my own selection mechanism used specifically for MapView. But how does this work with the existing scene heirarchy?
I had to create a selection "interface" within SourceView to allow subclasses to implement their own selection functionality.
[code]
class SourceView: public QGraphicsView {
private:
[..]
/* INTERNAL SELECTION
These complex-as-shit functions are for abstracting the actual selection "mechanism" away
from each scene. The default implementation uses a QPainterPath. The only view that overrides
this behavior is MapView, because it uses a custom, optimized-to-shit selection mechanism.
*/
//adds a rectangular region to the current scene selection
virtual void _sceneSelectionAddRect(const QRectF &rect);
//updates the latest-added rectangular region within the current scene selection
virtual void _sceneSelectionUpdateLastRect(const QRectF &rect);
//clears internal scene selection
virtual void _sceneSelectionClear(void);
}[/code]
SourceView has a default implementation, which uses QT's built-in selection mechanism. This can be utilized for any view which represents each tile as its own TileGraphicsItem within the scene. MapView implements its own selection mechanism, which I have created to be extremely efficient for tile-based selections. Since we are only selecting rectangular regions, I could be presumptuous about my datastructures and collision algorithms. For the actual selection region(s) within the screen, I used a simple vector of rectangles. Then I created a 2D array of booleans representing the "isSelected()" flag for each tile region within the scene. The vector of rects is used to flag locations in this array as the selected region changes. The MapViewTileGraphicsItems can then check whether each tile location they are rendering is selected or not by indexing into this array.
6. An Objective Look at the QGraphics Framework
In my time developing ESTk, and especially optimizing the MapView, I have done quite a bit of research regarding how other people were using QT's QGraphics Framework. I found near universal praise for smaller scenes and almost universal bitching for larger scenes. I am of the opinion that this bitching is unjustified. If you understand how the QGraphics Framework works, you should be able to achieve the performance you want even for larger scenes. Even the smallest little tweaks can result in a drastic performance increase.
The truth is that 40,000 QGraphicsItems is already a shitload, especially when you consider the power and functionality the framework provides for those items. I am impressed that the scene handles such a high number so well without any real optimization. I don't think it's an unrealistic expectation to require some tweaking to go over that number.
Questions, Comments, Complaints, Feedback?
So that's the end of this monster of an article. We write these for a variety of reasons: to engage our audience, to promote awareness of our project, to offer an education, to seek your feedback, to become better programmers, to stroke our own egos, etc. If you have any feedback of any sort or just want to discuss something you have read, please feel free to post in our discussion topic. We are no longer developing Elysian Shadows in complete secrecy. We want to get our fans involed too!
