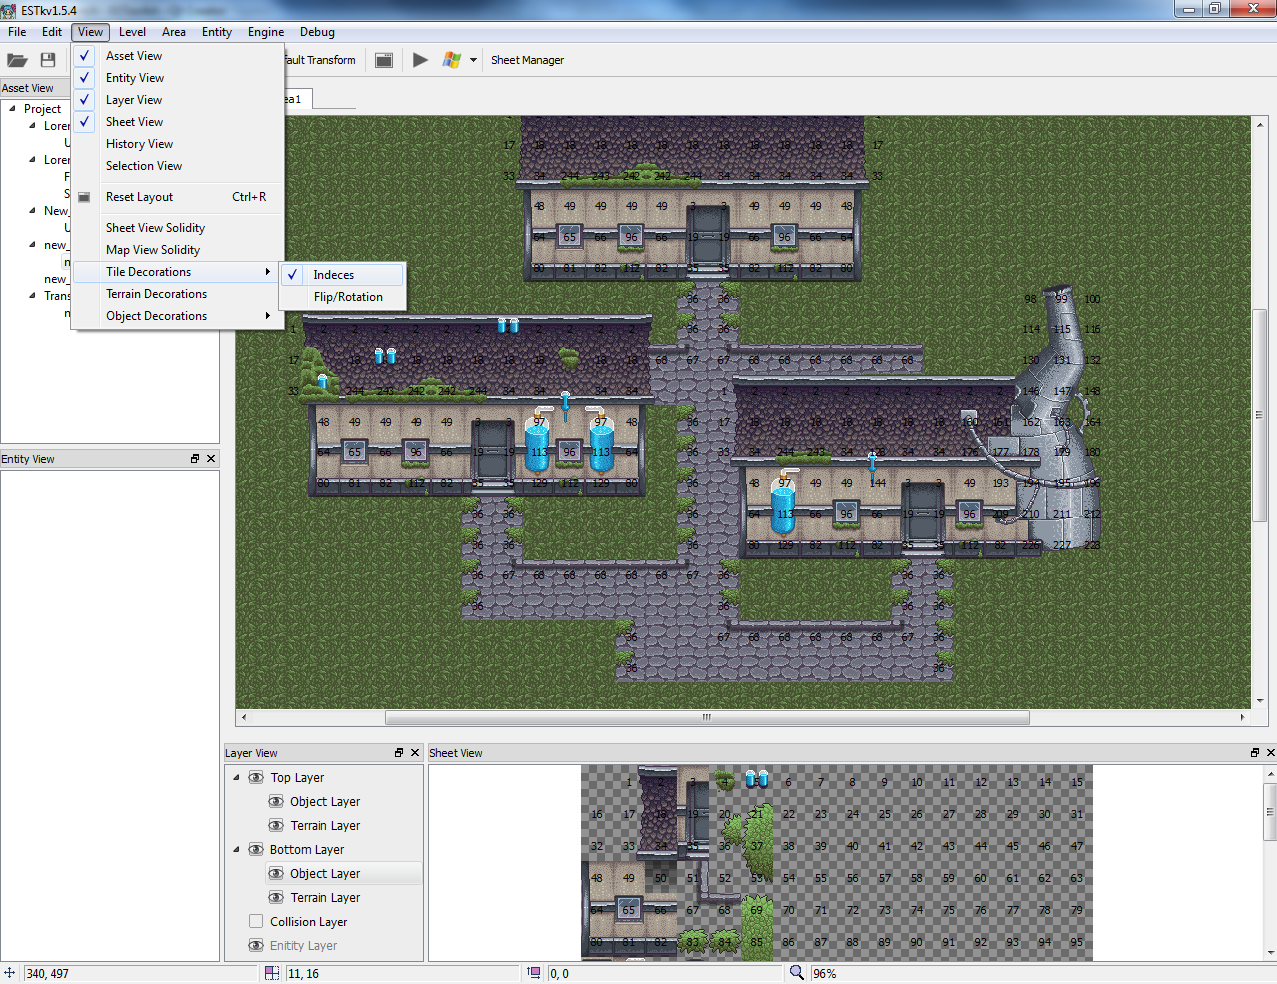
(still gotta fix the fucking floating point render errors with the elevation decorations)
ESTk is now sharing the depth buffer algorithm with the Engine. Objects and entities should be rendered in the correct order relative to each other and the camera, taking into account an object's elevation attribute.
An object can have an elevation value from 0 (default) to 15. "Elevation" basically tells the engine where the base of an object is located. If you look at the screenshot, you will notice the elevated objects start at 1 and work their way up as the object gets higher. This tells the depth buffer to group the objects together as a common base.
To quickly elevate and group objects together in ESTk like that, select a region (like a whole tree), then press '='. This will uniformly elevate the selection from its base. If you want to elevate an object higher, push the '+' key, and it will add 1 to every objects' elevation. '-' will subtract 1.
I took the liberty of adding a toggle to the "View" menu for rendering elevation decoration. Nonelevated tiles (elevation = 0) are rendered normally. Elevated tiles are rendered with a transparent color, calculated by their base location. This will allow you to easily visualize whether you have correctly and uniformly elevated your structure.
You may notice that only part of Patrick's house looks elevated. This is because the moss, tanks, and parts of the roof are on the TOP object layer. Tile decorations are rendered for the current layer only (Bottom Object Layer in the screenshot).
While I was at it, I added a few more decoration toggles (it took 10 seconds with the selection engine rewrite). I added one for rendering the tile indeces used:
This is useful for quickly checking which tile index is placed where (it also renders within Sheet View). It actually caught a few "map bugs" where we placed blank tiles that weren't tile #0 instead of tile #0... this technically slows rendering down, since the engine knows to skip tile 0, while it will render anything else.
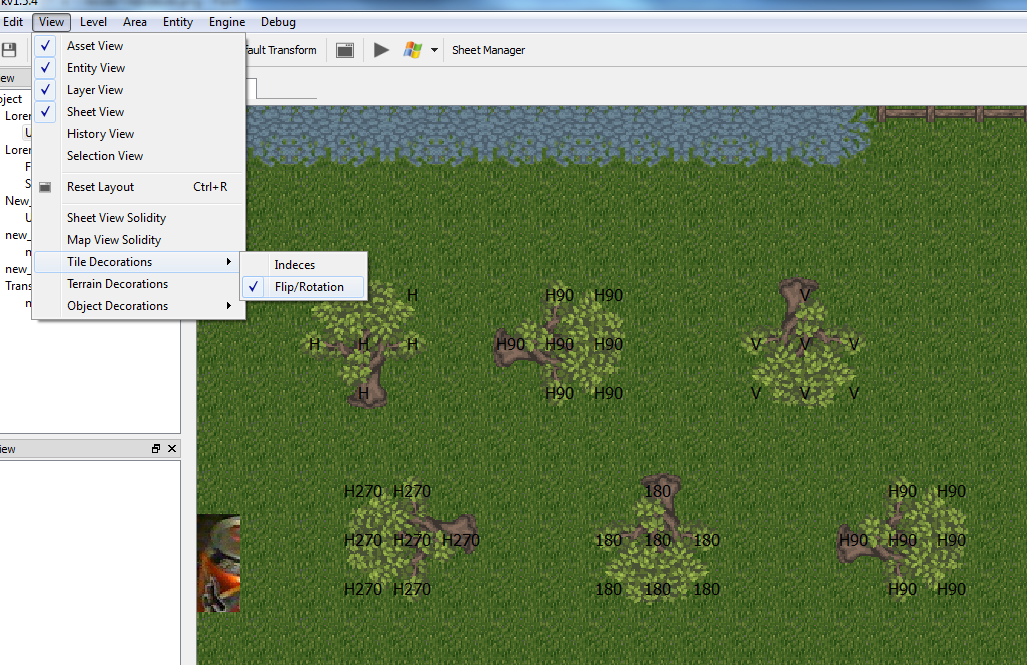
I also added the flip rotation state:
There have been a few times where I was trying to replicate something pragmatically within the engine, and I couldn't tell exactly how the tile had been reoriented from the toolkit. This will quickly enable you to see its flip/rotation state. Possible states are:
[code]H (flip horizontal)
V (flip vertical)
90 (rotate 90 degrees)
180 (rotate 180 degrees)
270 (rotate 270 degrees)
H90 (flip horizontal then rotate 90 degrees)
H270 (flip horizontal then rotate 270 degrees)[/code]
I also made several other little additions/fixes to ESTk... I added a toggle for the collision layer to Layer View, cleaned up all the compiler warnings, and a few other things that I will put into the release notes for ESTk1.5.4
All that is left for Gamma/Tk 1.5.4 is transitional Z warps, so we can make stairs, ladders, and ropes take the player between the top and bottom layers... After that is done, the "exploration" part of the engine is 100% done. We can lay solidity, elevate objects, chain together maps, traverse both layers, and do anything required for the player to explore the world of ES. Level designers and artists should have everything they can possibly need to at least create the world of ES while programmers focus on gameplay...
